Cheap RF Solution for Arduino
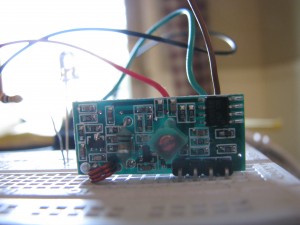
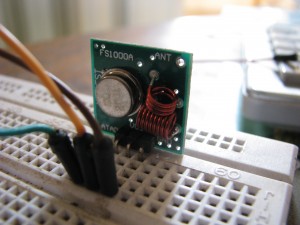
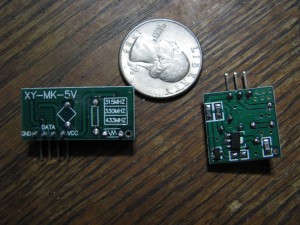
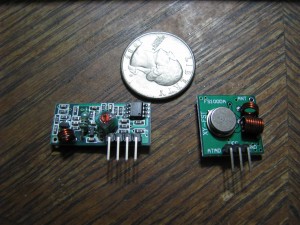
This write up revolves around my pursuit towards interfacing with a cheaper source of wireless RF communication. While browsing the Ebay I came across this pair of 433Mhz wireless transmitter and receiver pairs. The current price was approximately $1.99US a pair. As the saying goes, you get what you pay for. These modules are extremely simple consisting of a few transistors, coils, voltage regulation, and passive circuitry. Unlike the more expensive Xbee there is no networking capabilities, node ID’s, or packet formation. With this said, it takes a little more work to start throwing characters through the air.The modules are nicely labeled. DATA, GND, VCC on the transmitter and DATA, DATA, GND, VCC on the receiver. Note that both the data lines on the receiver are on the same trace, so it doesn’t matter which one you use.
Since I only had one arduino and didn’t feel like breadboarding another chip I chose to make a sketch that will transmit and receive from the same board to test if these things even worked. The modules were connected as follows:
TX	|	Arduino

DATA	|	Digital 7
GND	| 	GND
VCC	|	5V

_____________________________

RX	|	Arduino

DATA	|	Digtal 9
GND	|	GND
VCC	|	5V
To test if multiple RX modules would receive from the transmitter I also set one up on a separate power supply to an LED. That simple circuit is crudely displayed below.
GND  X--|GND

VCC  X-->5V

DATA X--------|LED>------|=1K=|-----|GND
This code uses a timer comparison to create a non-blocking loop that will pulse the TX pin ever 250ms. On the rx side the Arduino takes in a number of sample pulses and averages them together. The average pulse time is printed out in the serial monitor. You will notice that the number displayed is not exactly the number that is in const long interval. The reason for this is that Arduino language has a certain amount of overhead combined with typical RF distortion will cause variation within the timing patterns. For this we create a threshold which will account for +-20% timing variation.
//Cheap RF test code
//Written by: Bill Heaster
//TheCreator at ApexLogic d0t net


const int out = 7;
const int in = 9;
long previous = 0;
int state = LOW;
const long interval = 500;
const int sampleSize = 25;
const unsigned long lVal = (unsigned long) interval *0.75;
const unsigned long hVal = (unsigned long) interval *1.25;
unsigned long times[sampleSize] = {0};

void setup()
{
  pinMode(out, OUTPUT);
  digitalWrite(out, LOW);
  Serial.begin(115200);
}


void loop()
{

  unsigned long current = millis();


  if((current- previous) > interval)
  {
    previous = current;

    if(state == HIGH)
      state = LOW;
    else
      state = HIGH;
  }
  digitalWrite(out,state);

  int i =0;
  unsigned long val = 0;

  for(i = 0; i< sampleSize; i++)
  {
    val = pulseIn(in,HIGH,1000);
    if(val <= hVal&&val >= lVal)
    {
      times[i] = val;
    }
  }

  unsigned long avg =0;

  Serial.println("//////////");
  for(i = 0; i<sampleSize; i++)
  {
    avg += times[i];

  }
  avg = avg/sampleSize;
  Serial.println(avg);
  Serial.println("//////////");
}
I noticed that while running this code the modules communicated fine while each was located on the bread board. The module on the separate power supply was not blinking other than the modulation that naturally occurs on the data pin. Adding a piece of solid wire about 3 inches long to the small hole on the transmitter labeled ANT will GREATLY improve the range. Though this is only the beginning, being able to see that your investment wasn’t a waste is a good progress to me. Next post will be about Manchester encoding and protocol design. Possible Arduino Library in the works.
///////////////////////UPDATE////////////////////////////////////////
After seeing how many people are directed to this page from ebay or other retailers i feel that a better follow up is required for these modules. After getting my new scope i figured i would do some tests on these modules and show the results. The usage of these modules was discussed in the last post. For a brief overview. The modules require you to use some sort of encoding to pass your data from the TX to the RX. It is not as simple as just connecting the serial out of your Arduino into the unit and you’re ready to roll. The more expensive modules contain packet encoding, crc, etc. This write up will focus mainly on transfer rates and noise issues.
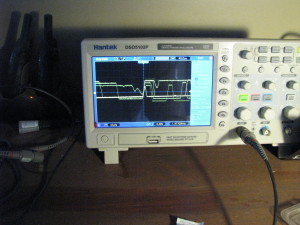
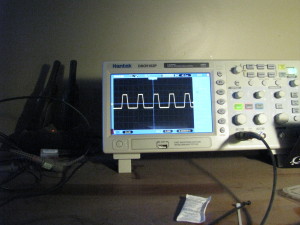
The 433mhz modules are very noisy when a signal is not being broadcast from the transmitter. As you can see by the scope picture below, the signal bounces around everywhere and is unpredictable.
To fix this there are several things that we can do.
*Define minimum and maximum pulse lengths for data transfers
Defining a minimum pulse length will allow you to discriminate the real data from garbage RF’s.
*Use a pre-amble
While defining packet protocol a pre-amble can be used giving the RX time to stabilize before actual data is sent.
*use a CRC
CRC’s can be incorporated easily into software, this will eliminate packets that get malformed during sending or receiving.
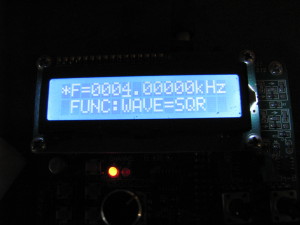
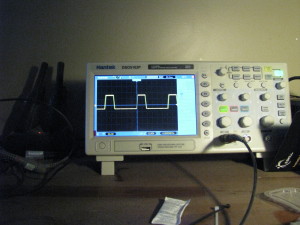
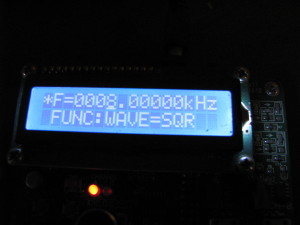
These will all help with successful data transmissions. Another thing to note is the switching capability of these modules. Sending a square wave form from the TX to the RX shows that we can achieve a clear signal while transmission is occurring. This is typical up to about 8Khz. On the opposite end of the spectrum allowing to much time in between pulses will allow artifacts to creep into the transmission. With that said, It is not recommended to transfer anything lower than 4Khz. I also found that even at 4Khz there were still some packet loss. An optimal transmission should rest around 6Khz, this will give you a decent transfer speed while retaining stability.
2 comments
Leave a Reply
You must be logged in to post a comment.
sir ,
i want sample code for Rf serial tx, rx using arduino …
Ryan,
The wireless modules that I am using are bottom of the line cheap. They consist of nothing more than a coil, tank circuit, and some other passive components. With that said, they don’t contain a lot of features that you might see on the Xbee modules. The Serial.println function only prints to the serial terminal that is connected through the FTDI chip to USB port. What’s being transmitted is just a series of pulses on the “out” pin that occur ever 500ms. The “In” pin reads these pulses and prints the average of 25 samples it collects. You will notice that the number that appears in the serial terminal is not always the 500ms delay we specified. This can be caused by overhead of the firmware running on the microcontroller by using things like the Arduino Library. On the other hand it could also be attributed to the crappy quality of the wireless modules. Either way, this test is mainly to see if your cheap wireless modules actually have the ability to transmit and receive.
In order to send data on these cheap modules you have to implement some sort of encoding. Bi-phase, Manchester, or roll your own. Manchester is more difficult but has the ability to combine the clock and data into the same transmission. Things like CRC checksums are also beneficial to make sure that the data being received is what was actually sent. If you only require the simulation of a button press you can also look into Linx encoder /decoder chips. I have had a lot of success with these on simple projects (garage door openers, door bells, etc.) They also carry 3 different versions LS, MS, HS. The LS offers no security features while the HS has 256 bit encryption. They don’t even pay me either 😉
Attached is some edited code for better understanding.
//Cheap RF test code
//Written by: Bill Heaster
//TheCreator at ApexLogic d0t net


const int out = 7; //the pin to the Transmitter
const int in = 9; //the pin to the receiver

long previous = 0;

int state = LOW; //holds the current state of the output pin

const long interval = 500; //this is the ammount of time between output pulses

const int sampleSize = 25; // the ammount of samples to average together

//these are threshold values, they will drop pulses that are less than 75% or more than 125% of interval ammount
const unsigned long lVal = (unsigned long) interval *0.75;
const unsigned long hVal = (unsigned long) interval *1.25;

//holds the sample times
unsigned long times[sampleSize] = {0};


void setup()
{
  pinMode(out, OUTPUT);
  digitalWrite(out, LOW);
  Serial.begin(115200);
}


void loop()
{

  unsigned long current = millis();//set current time

  //if we are at the interval point, pulse the pin
  if((current- previous) > interval)
  {
    previous = current;

    if(state == HIGH)
      state = LOW;
    else
      state = HIGH;
  }
  digitalWrite(out,state);


  //start collecting samples
  int i =0;
  unsigned long val = 0;

  for(i = 0; i< sampleSize; i++)
  {
    val = pulseIn(in,HIGH,1000);
    if(val <= hVal&&val >= lVal) //if the pulse width is in between our thresholds
    {
      times[i] = val;//place the time in the array
    }
  }

  unsigned long avg =0;

  Serial.println("//////////");//print a line to seperate the numbers

  //calculate the average time from our samples
  for(i = 0; i<sampleSize; i++)
  {
    avg += times[i];

  }
  avg = avg/sampleSize;

  //print the average time
  Serial.println(avg);


  Serial.println("//////////");
}